Do you want to increase video quality in PotPlayer and don’t know how to do that? Don’t worry, in this article, we’ll guide you for a potplayer settings for best video quality.
How to Increase Video Quality in PotPlayer
To increase video quality in PotPlayer up to 4K, just follow the below steps one by one.
1- General Section
- Open PotPlayer and click on three horizontal bars in the top left corner. After the menu opens, click on Preferences.
- Firstly, Go to the General > Auto check for Update: change to > “Never” & Untick the “Auto download files if an update available“.
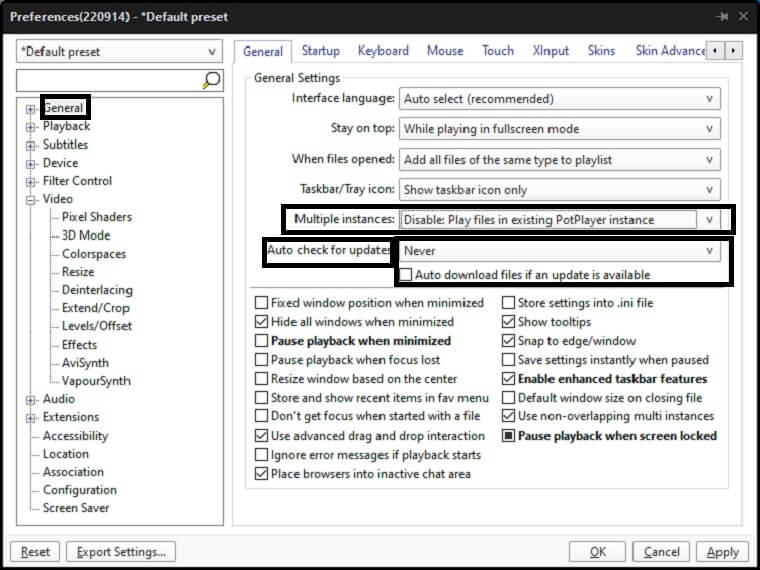
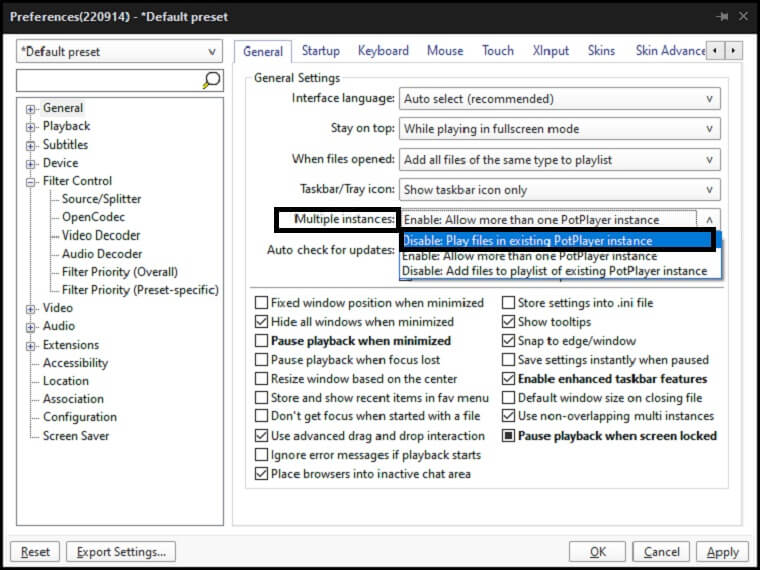
- Now Go to the Multiple instances(5th option in general settings): change to > “Disable: Play files in existing PotPlayer instance“. Click on Ok.
2- Filter Control Section
- Go to Filter Control > Video Decoder and click on “Built-in Video Codec/DXVA Settings” & a new window will open.

- On the top of the new window, Tick the “Use DXVA” & Tick on “Prioritize D3D11 DXVA”.(If you’re using below Windows 10, then don’t Tick on “Prioritize D3D11 DXVA”).
- On the right side of the new tab, go to MPEG4: Change to > “VLD(Bitstream Decoding)” & Click on OK.

3- Video Section
- Go to the Video > Video Renderer: change to “Built-in Direct3D 11 Video Renderer“.( If you’re using below Windows 10, you can use D3D9 video renderer or EVR Custom perset instead of Built-in Direct3D 11 Video Renderer).
- Go to Colorspace > YCbCr <-> RGB conv.matrix: change to > “ITU-R BT.709.

4- Audio Section
- Go to Audio > Normalize/Freeveb > Uncheck the “Enable” > Click on “Apply“.

That’s it, you can watch videos now up to 4k video quality.