GShade is a heavily modified version of ReShade that adds new features and improvements, including automatic settings detection for over 300 games. GShade download is available for Windows OS (Windows 7 SP1, 8.1, 10, or 11), Linux, and even Mac. It works the same as ReShade by injecting custom shaders into the rendering pipeline of a game to alter the final displayed graphics.
G Shade is also specifically tuned and optimized for Final Fantasy XIV (FFXIV). However, that doesn’t mean it won’t work with other games, it will work with almost every game that ReShade is compatible with like Sims 4, Roblox, Cyberpunk 2077, World of Warcraft (WoW), Minecraft, GTA 5, Elder Scrolls Skyrim, and even GTA 5’s RP server FiveM.
GShade Vs ReShade
It is a fork of ReShade that runs lighter, faster, and smoother. Its users also report that G Shade is more user-friendly, easier to use/learn, and comes pre-loaded with 100+ reshading presets and support for over 300 games.
There was a rumor in February 2023 that GShade was infecting its users’ PCs with malware which led many users away from using it. Its website and GitHub page came back online in April 2023 but the dev has made no official statement about the rumors. The main gripe players have with this is that the dev has issued no apology or acknowledgment and many are hence choosing to stay away from it.
Whereas users of ReShade say that the learning curve is quite steep and the effect it has on the game’s performance is too much. However, ReShade is better when it comes to stability and safety and one can never be too safe when it comes to viruses and malware. Also, one thing to keep in mind is that even its GitHub page was taken down because of the malware.
How to Set Up GShade for Final Fantasy XIV (FFXIV)
This same process can be replicated for every other game like Sims 4, GTA 5 FiveM, Cyberpunk 2077, etc. Take a look at the steps below to learn how to set it up:
Step 1: Start the GShade download and then launch the downloaded installer via the exe file.
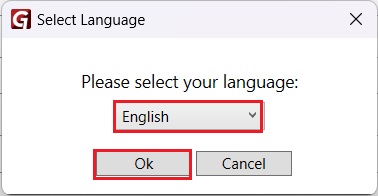
Step 2: Select your preferred language and click OK.
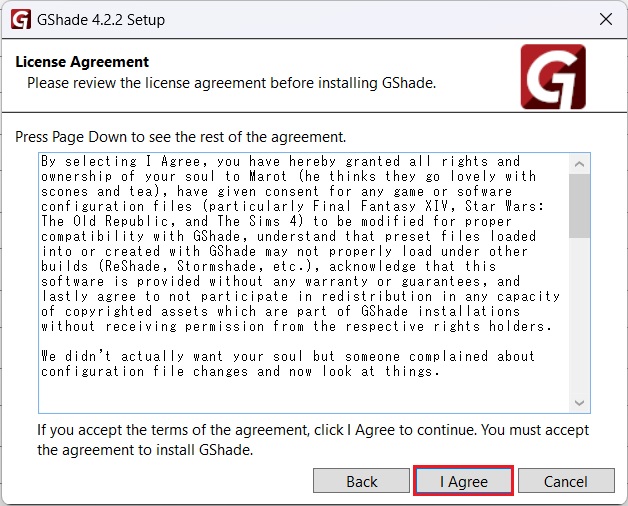
Step 3: Click I Agree to proceed to the next step.
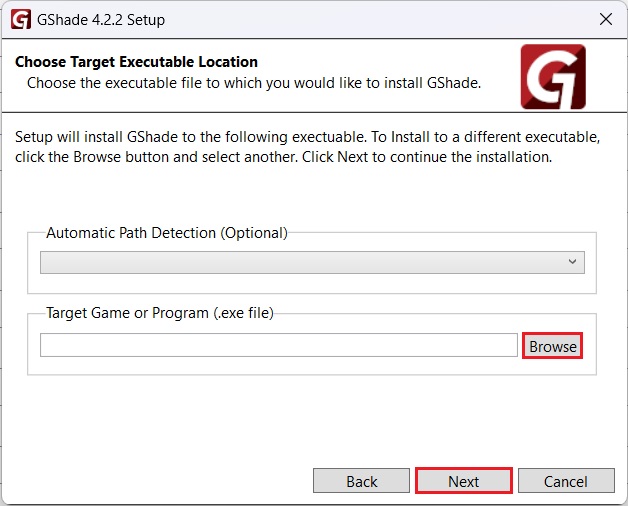
Step 4: Select the executable (exe file) of the game you want to install the app into by clicking Browse. Once the exe file is selected click Next.
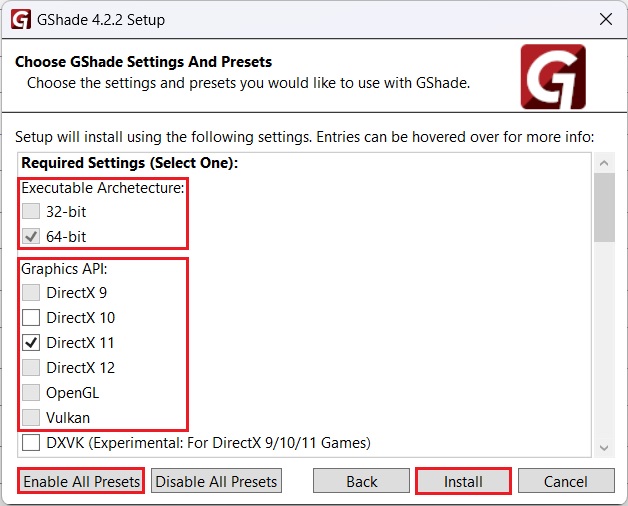
Step 5: Select the architecture of the selected exe file (32-bit or 64-bit) and the graphics API it runs on (DX 9, DX 10, DX 11, DX 12, OpenGL, or Vulkan).
Note: A quick Google search can help you find the right option if you don’t know what to select at this step.
Step 6: Click on “Enable All Presets” and then click Install to begin the installation process.
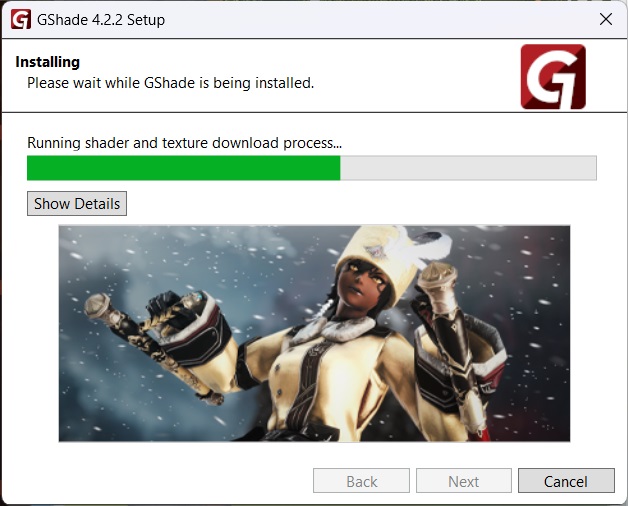
Step 7: Let the installation process complete and click Finish once done.
How to Download & Install GShade
For the GShade download and installation guide follow the steps below:
Step 1: Download the latest version by going to the top of this page.
Step 2: Once downloaded, follow the steps in the How to Set It Up for Final Fantasy XIV.
Step 3: When following Step 4 in the above-mentioned section, select the exe file of the game you wish to install it into instead of Final Fantasy XIV’s (FFXIV) exe file.
Step 4: When following Step 6 from the above section click Disable All Presets instead of Enable All Presets.
Step 5: Once it is installed, you do not need to repeat the steps above for installing it on other games. Simply launch the G Shade Control Panel shortcut on your Desktop.
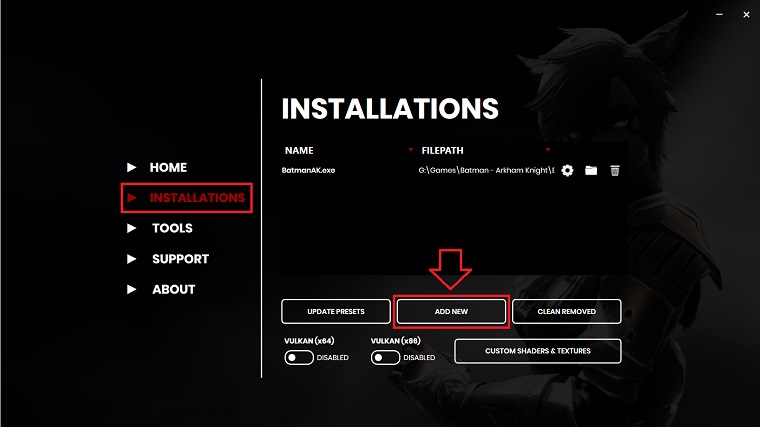
Step 6: Go to the Installations tab and click Add New, from here the steps are the same as we did earlier (selecting the exe file > select the graphics API > install).
How to Use GShade
Let’s get you started with the basics of how to use it. You can then experiment with these settings and master them later on.
Step 1: Launch the game in which you installed the shader app. Let it compile the shaders, it may take a while depending on the number of installed presets or shaders.
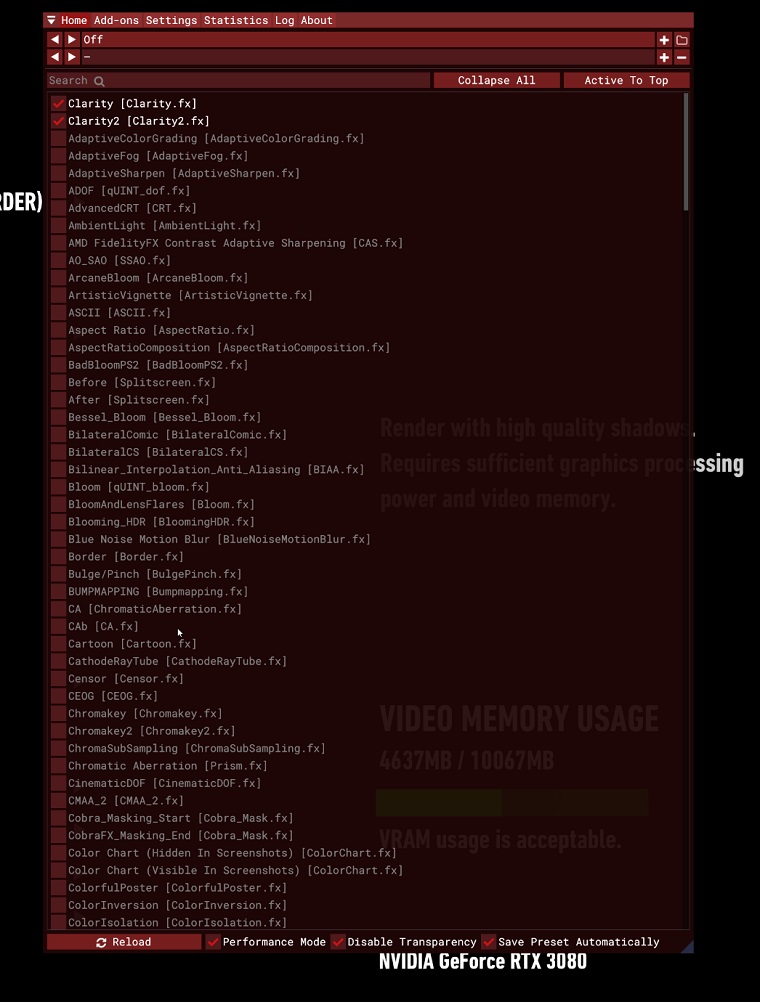
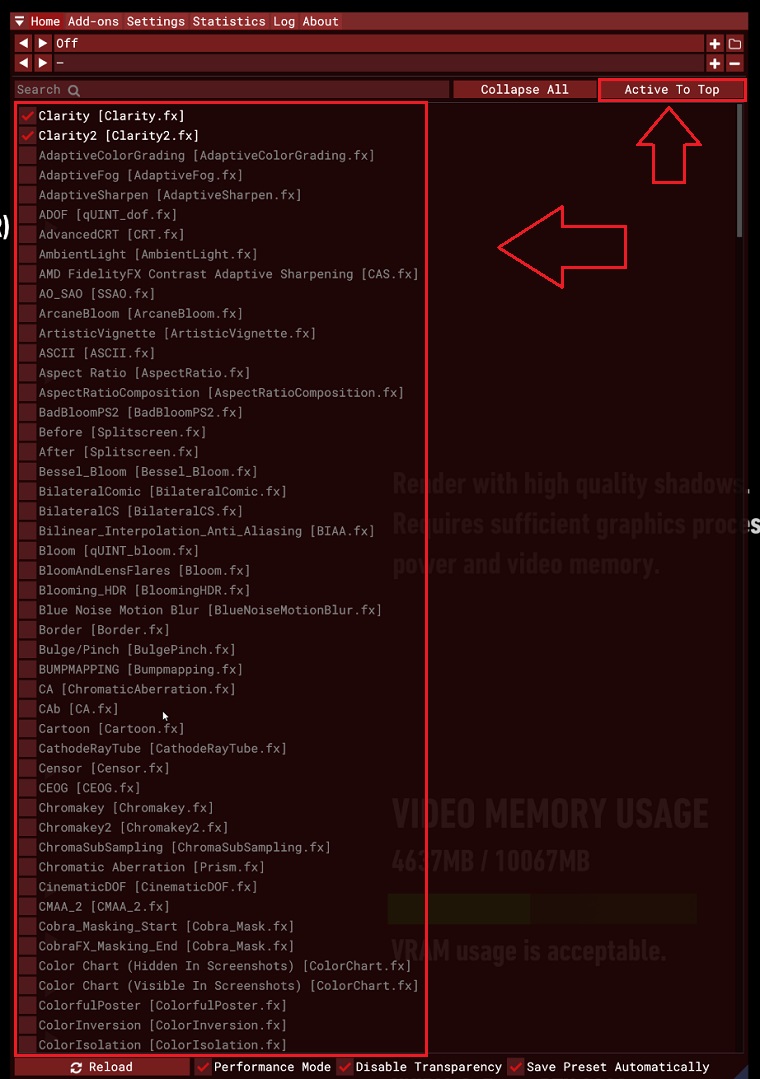
Step 2: Once done with the compiling. Press the Shift + F2 (for us it was Shift + Backspace) button (in-game ReShade menu button) to open the ReShade in-game menu and select whichever effects you want to enable. For example Ambient Light (AmbientLight.fx), Clarity (Clarity.fx), etc.
Step 3: You can also download custom presets like games by searching for their presets like this: G Shade Sims 4 presets.
Note: It will tell you what is the menu button after compiling shaders so keep an eye out for that. By default, it is Shift + F2. Also click on Active To Top to keep better track of active shaders.
How to Uninstall GShade?
It has a built-in uninstaller in the Control Panel. Follow the steps below to remove it completely from your PC.
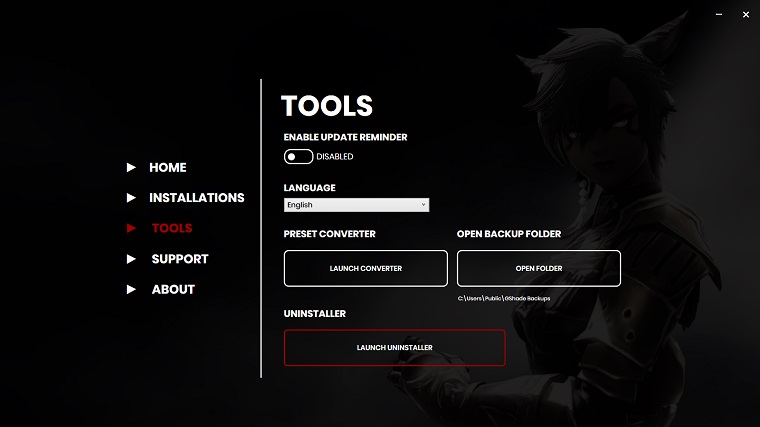
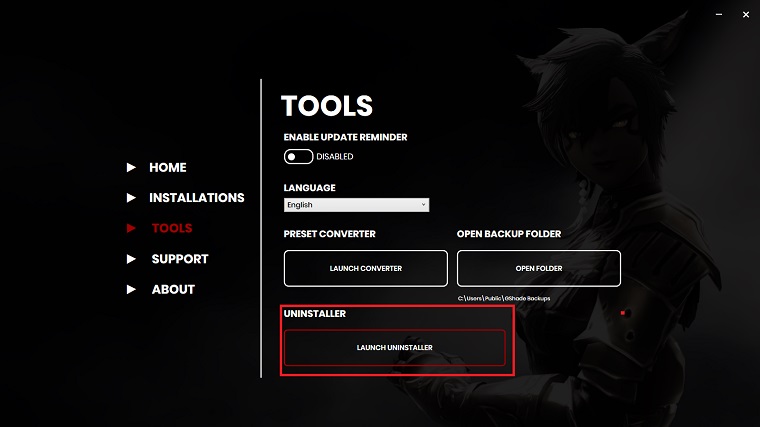
Step 1: Launch the G Shade Control Panel. Go to the Tools tab and click on Launch Uninstaller under the Uninstaller section. Click Yes in the small pop-up window and the uninstaller will launch.
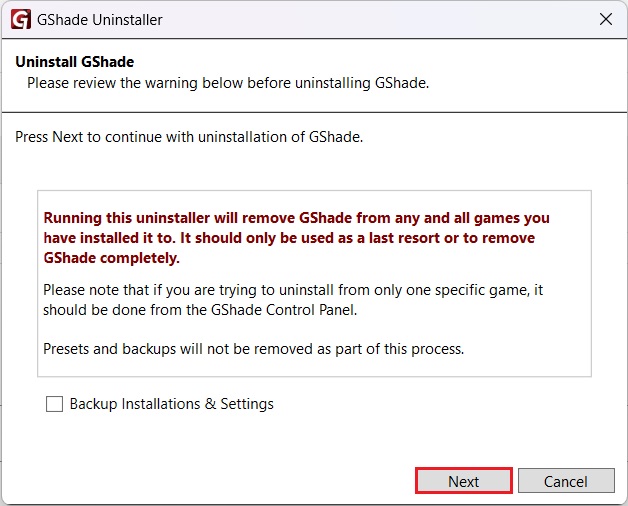
Step 2: Click Next to proceed forward with the uninstallation process.
Note: If you don’t want to save your installations and settings then uncheck “Backup Installations and Settings” also.
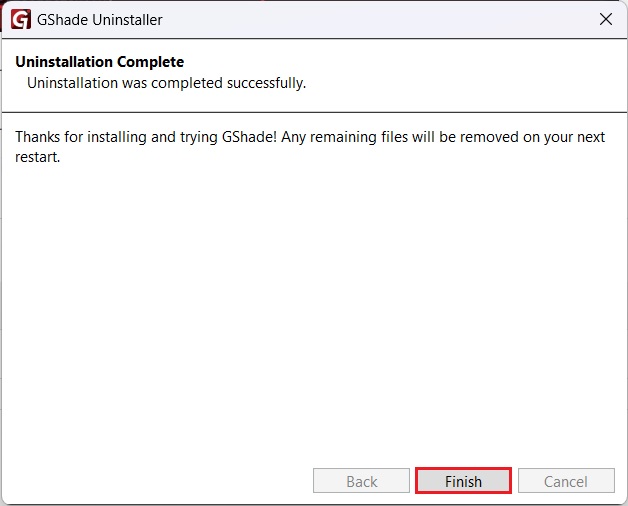
Step 3: Let the uninstallation process complete and click on Finish.
How To Bring Up GShade Menu
You can open the in-game menu by pressing the Shift + F2 menu hotkey. This will open up a window in which you can enable and disable shaders, load custom Reshades, manually adjust each effect, etc.
FAQs
You can open it in-game by pressing the Shift + F2 menu hotkey button.
Take a look at our How to Uninstall G Shade section above to learn how to uninstall it from games like FFXIV, Cyberpunk 2077, Roblox, Minecraft, etc.
We are unsure about this as the older versions that were removed had a virus in them. So there’s a chance that the current version might be infected too. We advise not taking the risk of finding out yourself and using ReShade instead.
