Installing a second internal Hard drive not only gives you more storage space but also speeds up your computer up to 5 times if you use the latest SSD drives and move Windows partition (C: drive) into it. The installation process includes mounting the second hard disk, connecting the cables, and formatting the mounted second internal Hard drive.
Mounting and Connecting the Second Internal Hard Disk
Most of the internal hard drives are mounted in a drive cage. The orientation of the cage SATA (Serial Advanced Technology Attachment) is a standard for connecting the hard disk to the motherboard. It’s a thin, flat, and 7-pin long cable. The 15-pin data connection cable is used to transfer data between the hard drive and the motherboard. Mounting the hard disk is the only difficult part of the installation process but the following steps will help you easily connect the hard drive.
5 Easy steps to Mount & Connect the second Internal Hard Drive
- Turn off your PC.
- Open the PC case and hard drive cage.
- Secure the hard drive to the cage using the four screws on the bottom or side of your internal hard disk.
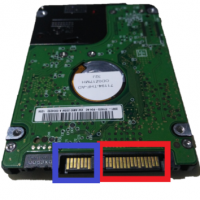
- Connect the SATA power and data connection cable.
- Close the case carefully to mount and connect the second Internal Hard Drive.
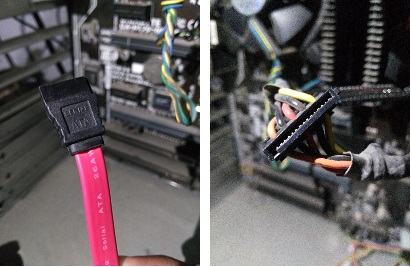
SATA cable(left) Internal Connection Cable (right)
Note: Make sure no dust resides between SATA and connection as it can later result in a blue screen error.
Related: How to fix Blue Screen of Death in Windows 10
Preparing Second Internal Hard Drive for Use
1. Turn on your PC and log in to Windows.
2. Click on the Windows icon in the lower-left corner and search “Disk Management“.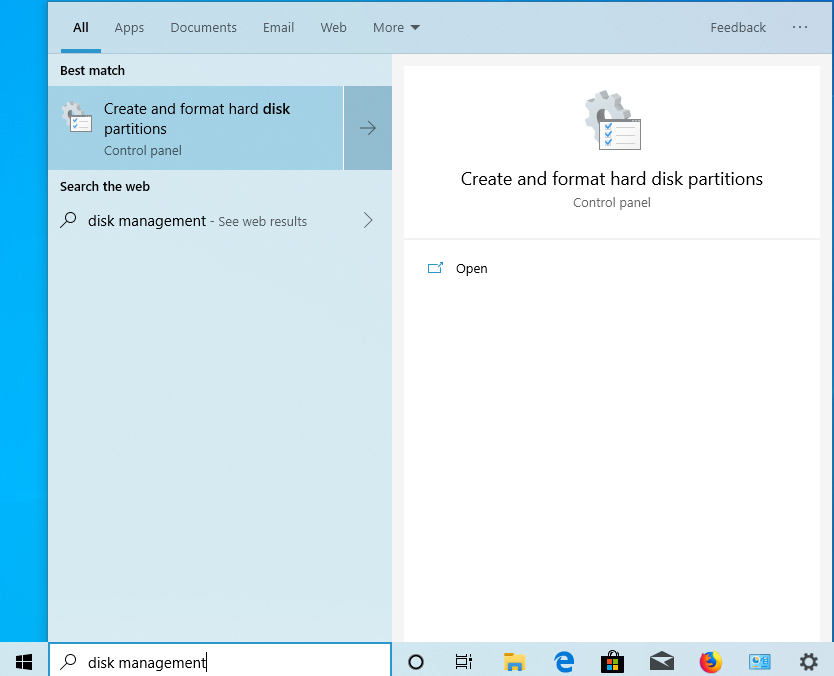
Disk Management Windows 10
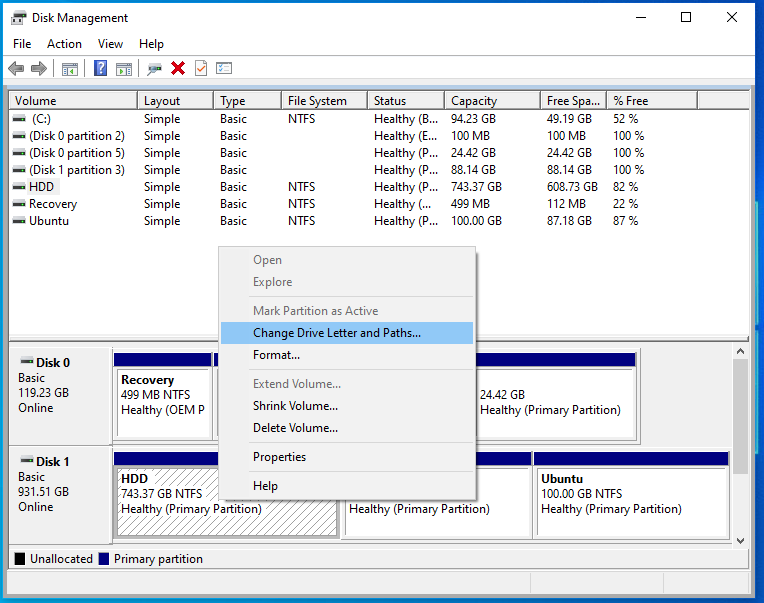
3. Click on “Create and format disk partition“. Disk management utility will open. (Disk manage pic)
Note: If the second drive is not new, it may be formatted and partitioned already. In this case, you may only need to assign a drive letter to it. But, if it’s a new hard drive, you have to format it.
Assigning a Drive Letter in 2 steps
An old disk drive may be partitioned correctly and has data in it, but still not shown in file explorer. The reason is that it is not assigned a letter by Windows. Usually, when you remove an internal hard disk from one PC and install it to another, The drive forgets its assigned letters.
1. In the disk manager utility, right-click on the hard drive partition to which you want to assign a letter and click “Change drive letter and Paths …”. A dialog box will appear.
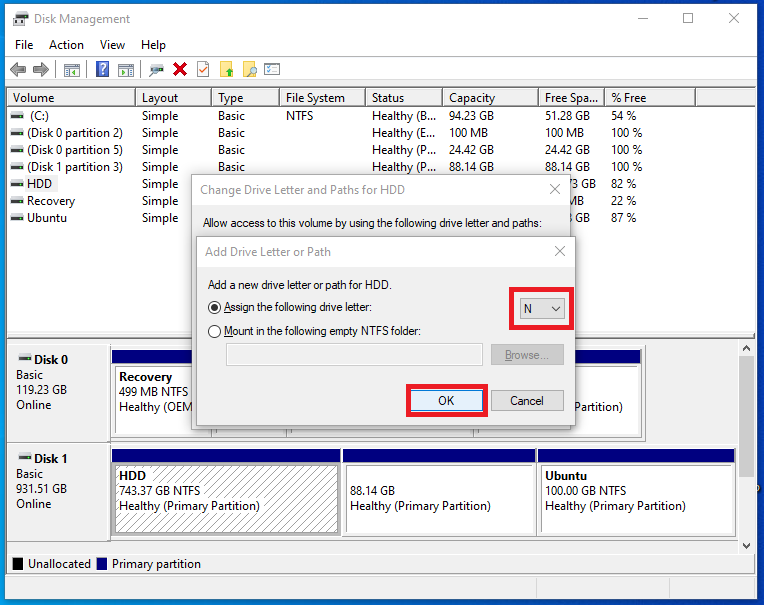
2. Click “Add” to add a new letter path for disk partition. Click “Assign the following drive letter:” and Choose any letter you want to assign.
Click “OK“. A new drive letter will be assigned. Now, you can explore the drive and copy new data into it using File Explorer.
Formatting the Hard Drive
Almost all the new drives don’t come with partitions. You have to first allocate the space which will also format the partition automatically. The unallocated space is shown in black in disk management. To allocate and format the drive, follow these simple steps:
5 Quick Steps to format your Hard Disk/Second Internal Hard Drive
1. Right-click on the unallocated partition and click “New simple volume”. A new Simple Volume Wizard will appear.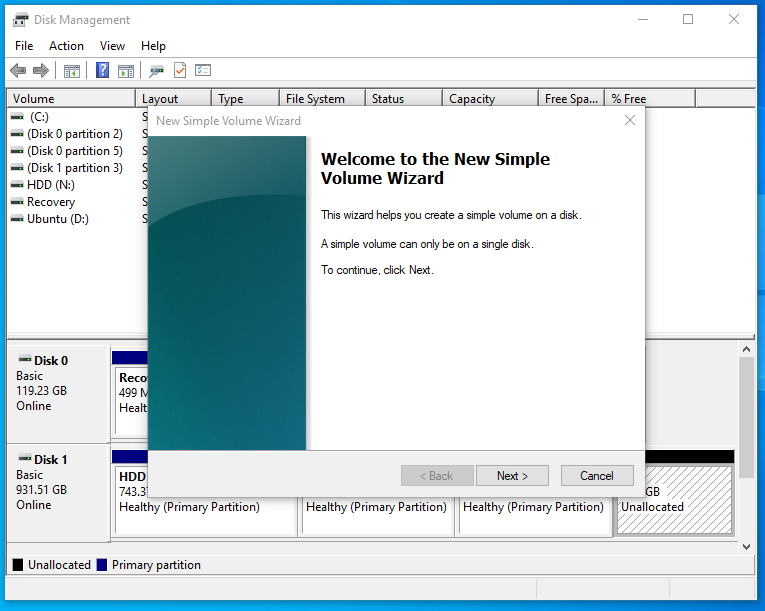
New Simple Volume dialog
2. Click “Next” and choose the volume size. The default value will assign all the space available to this partition.
3. Click “Assign the following drive letter:” and Choose any letter you want to assign.
4. Click “Next”. The format partition dialog will appear. It has many options related to partition settings but doesn’t change these settings as the default options are best for most of the users.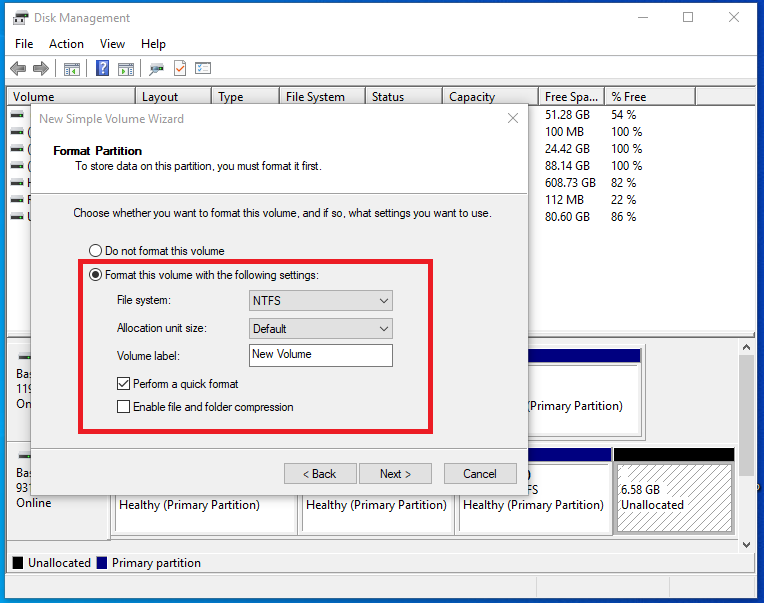
Format Options for new Volume
5. Click “Finish” after reviewing the settings. The allocation and formatting will be completed soon and the second internal hard drive will be available to use in file explorer.
Phew! now as you are done with your second internal hard drive installation, why not use the extra space and treat yourself by downloading a movie or any latest AAA game. Let us know your experience of installing the second internal hard drive yourself in the comments section below!